From The Integration of Dominican, Chinese, Russian and Mexican Immigrants in NYC
Contents |
Creating a New Page
To create a new page, you enter the title for the page in the Search window on the top right side. If there is no page with that title, you'll get a message that the page does not exist and you will have the option to create the page. You can also check the list of all pages in the Wiki under Special Pages in the menu to the right.
Writing/Editing
You can use the editing toolbar above this text box to format the text (e.g., to bold or italicize your text). Or, you can use code:
''' bold'''
''italicize''
For more advanced formatting, including bulleted lists, go here.
Links
To create an internal link to another page in the wiki, put double brackets around the title of the page. For example: Please click on Wiki Authors to see a list of authors working on this wiki.
Or: Please click here to see a list of authors.
See the code I used here:
[[Wiki Authors]]
[[Wiki Authors|here]]
To create an external link, put single brackets around the website. If you want something else to appear in the text, leave a space after the website address and then write the words in.
For example, this is an external link to Queens College
Uploading Photos
From the left-hand menu, under Special Pages, select Upload File.
Then Browse and upload your image.
In your post, use the following code to insert an image:
[[File:Example.jpg]]
Where it says "Example," you should put the name of your file. If you click the icon with a Photo from the Editing Menu, it will insert the code automatically, and you just need to change the filename.
Resizing and Captioning Photos

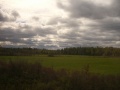
Often the dimensions of a photo are way too big, so we need to resize them. I resized this photo by using the following code:
[[File:Montreal1.jpg|300px|none|thumb|View from train]]
"300px" controls the dimensions. "None" refers to the alignmet; if I put "right" or "left," the text would rap around the image instead of run underneath it. "Thumb" frames the photo. The text after the last bar becomes the caption.
Making an Image Gallery
Here is an example of an image gallery, if you have a lot of related images that you want to group together.
 Train View 1 |
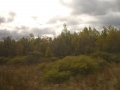 Train View 2 |
 Train View 3 |
To make this gallery, I used the following code:
<gallery>
Image:Montreal1.jpg|Train View 1
Image:Montreal2.jpg|Train View 2
Image:Montreal3.jpg|Train View 3
</gallery>
Note that you don't need to use the brackets around the Image code when you're making a gallery. The code to the left is the image file name, and the code to the right of the bar is the caption.
Adding More Text to a Photo
Here, rather than a simple caption, I've added something like a chart of text.
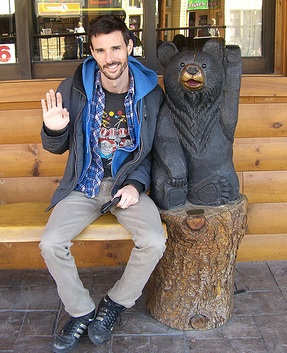
| Date of Birth | 12 February 1975 |
|---|---|
| Birthplace | Cleveland, OH |
| Location | New York, NY |
| Education | New College of Florida |
| Major | Social Sciences/Gender Studies |
The image was embedded and the text added by using the following code:
[[Image:Craig_in_TN.jpg|350px|none|thumb|

{| style="color:black;background-color:white;"
!
|-
! Date of Birth
| 12 February 1975
|-
!Birthplace
|Cleveland, OH
|-
!Location
|New York, NY
|-
!Education <br>
|[http://ncf.edu/ New College of Florida]<br>
|-
!Major <br>
|Social Sciences/Gender Studies
|-
|}
]]
Embedding Video
To embed video, we will upload it to a hosting service (such as Youtube) and then you can embed it directly on the wiki page, like this video of a PowerPoint presentation I made:
The code for embedding video looks like this:
<videoflash>XhrJD3TWvXg</videoflash>
As you can see, it's very simple. The letter-numbers string in the middle of the code is the ID of the video from Youtube.
Embedding Audio
Here is an example of an embedded audio file.
Unlike videos, which we need to upload to an external hosting service, audio files are small enough to upload directly to the wiki. You upload it just like a photo, from the "Upload file" link on the Toolbox on the right sidebar. The code to embed a song, and have it play on automatically on a loop, looks like this:
<flashmp3>jig.mp3|loop=yes</flashmp3>
Google Maps
To embed a map, you create the map at Google Maps and then paste the embed code. You first need to allow for html code with the following:
<html>
Then copy the embed code generated by Google Maps. Paste that code after the html tag. At the end, you need to "close" html, like this:
</html>
Here is an example of what the map will look like:
View Larger Map
SlideShare
To embed a slideshow, you first need to sign up for an account on SlideShare. Then you can upload PowerPoint, Keynote, pdfs and docs.
To embed the file, you first need to allow for html code with the following:
<html>
Then paste in the embed code generated by SlideShare. It's on the top right corner of the uploaded presentation. Then paste that code after the html tag. At the end, you need to "close" html, like this:
</html>
